When working on a traditional painting, once I've completed the drawing, I transfer it to watercolor paper (or some other surface) and do a monochromatic underpainting, usually in raw umber. I occasionally begin a digital painting with a monochromatic value study as an "underpainting" too but more often than not, I just plunge straight into color.
Step 4: I place the final drawing in a Photoshop channel in a new RGB file and make that channel visible at an opacity of about 70%. Then I begin painting. This approach enables me to see the drawing as I'm blocking in color.
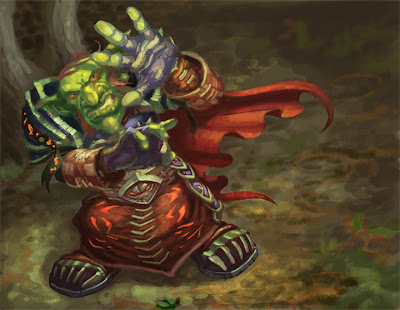
I start with a base color as my background. In this case it was a light brown. Sometimes I add a texture over that color just to give myself a little more than flat color to work over. Using Photoshop's standard hard round brush and a custom variation or two, I begin adding color, modeling forms, etc., using the drawing in the channel as a guide. This stage is the equivalent of glazing color over a drawing or underpainting on a traditional piece.
Step 5: Once I have the basic colors and values established, I copy what I've just painted to a new layer, load the aforementioned line drawing channel as a selection, invert that selection, and delete. I then change the layer's mode to Multiply. This gives me a dark version of the line drawing on top of the colors I've painted. The lines are darker versions of the color lying beneath them. This step may sound technical to those not familiar with Photoshop but trust me, it's very simple.
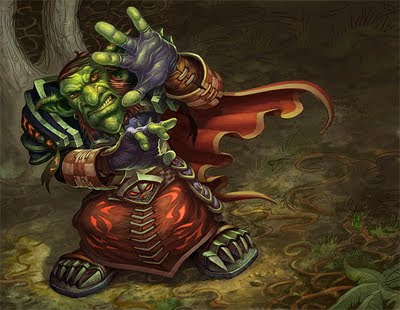
I erase some of the linework on the multiply layer completely and reduce the opacity of other areas. Then I drop the multiply layer down onto the color layer, re-save the file and take it from Photoshop into Corel Painter. There, using a variety of brushes, I begin refining forms, adding texture and covering the lines (which are only there to serve as a guide and tighten up a few areas for me). In the second image above, the goblin has largely been finished while the line can still be seen in parts of the background.
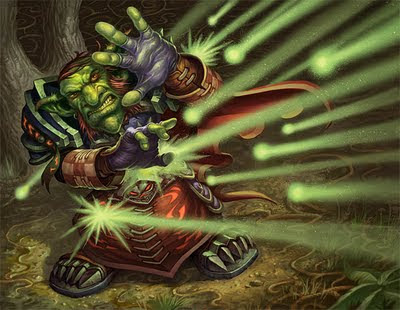
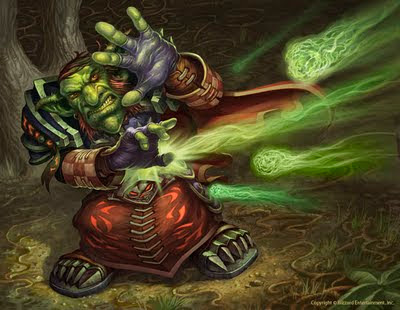
Step 6: The painting goes back into Photoshop for more refining, primarily using the default hard round brush. The raining energy effects were added on a layer and I also added some spatter by pasting a scan of spattered ink into a channel, loading it as a selection and painting into the that selection wherever I wanted spatter to appear.
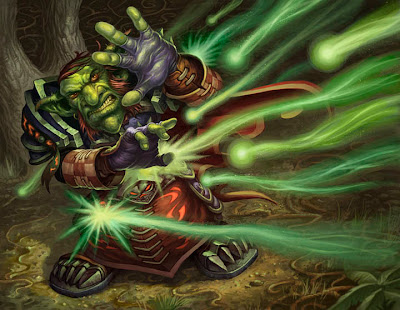
Steps 7 and 8: The raining energy ended up looking too regular and mechanical so I repainted it, varying the colors, light trails, etc. This still wasn't quite right so I took a third shot at it, cutting back on the number of energy trails and painting the "projectiles' as something akin to green fireballs. As you can see from the examples above, the flexibility to make changes like this is one of the great advantages to painting digitally. I was able to keep the raining energy on a different layer than the figure and background and consequently, I could change it as often as I liked without effecting the rest of the picture.
I hope that's not too much information in one post and that some of you find this kind of process talk useful and informative!

I bought Painter 9 about 3-4 years ago but never went beyond the tutorial DVD. I'd love to pick your brain sometime about what it can do. I've been a 100% Photoshop guy for almost a decade.
ReplyDeleteScott, I'll be happy to offer up whatever knowledge I have to share about Painter. I'm not exactly intimately familiar with the program but I've managed to find some things it does that I like and I focus on those functions. I'm still primarily a "Photoshop guy".
ReplyDeleteVery cool Jim! As a person without an artistic bone in my body, but who appreciates art, I'm always fascinated to see the processes you guys use. For me it is like watching a magician.
ReplyDelete